

Search help pages:
There is a youtube video available about installing Apresa in VMware ESXI.
Installing Call Recorder Apresa in VMware ESXi
Contents
1.1 Introduction
1.2 Upload the Apresa installer
1.3 Create a new Virtual Machine
1.4 Run the Apresa installer
1.5 Install Apresa
1.6 Network and internet access configuration
1.6.1 Configuration with DHCP
1.6.2 Configuration without DHCP
1.7 Install VMware Tools
1.8 Setting for Port Mirroring
1.1 Introduction
This manual explains how to install Call Recorder Apresa as a virtual machine in VMware ESXi. Licensing is discussed in separate documents.
Log on to VMware ESXi.
1.2 Upload the Apresa installer
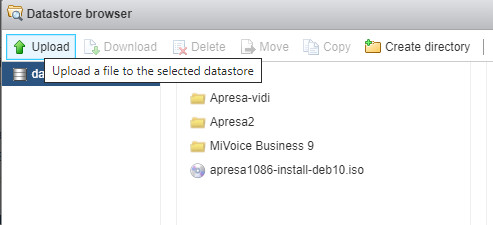
The Apresa installer is an iso file you can download from www.vidicode.com. After downloading the installer from the website, upload it to the Storage of VMware. This can be done as follows:
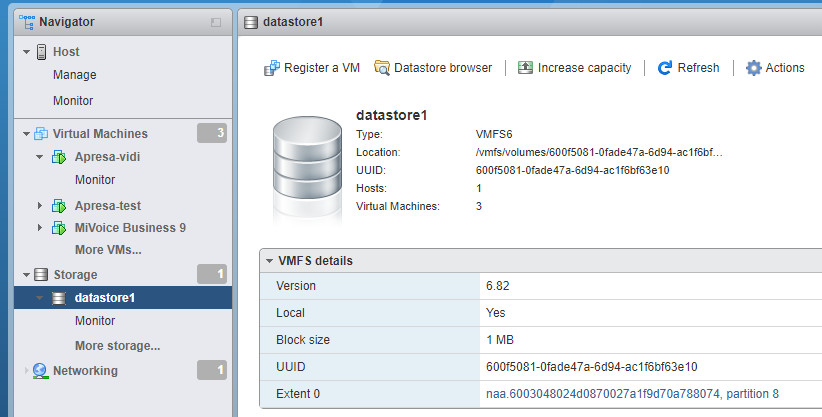
Click on Storage in the left menu and select datastore1. In the pane to the right (datastore1), select Datastore browser. Click on upload. Browse to the iso, for example Apresa1086-install-deb10.iso. Click Open to upload the iso.
1.3 Create a new Virtual Machine
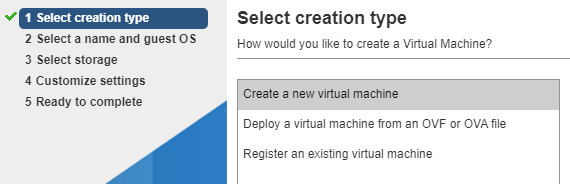
Right-Click on Virtual Machines.
Choose Create/Register VM. This opens the New virtual machine window.
Choose Create a new virtual machine.
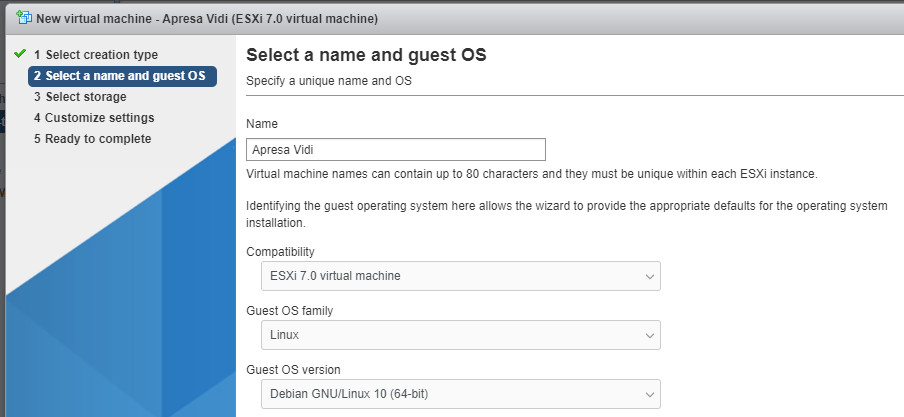
Click next. Fill in Linux, Debian GNU/Linux 10, 64 bits.
Click next. Select datastore1.
Go to Customize settings and wait until the page is loaded.
Make sure to assign enough disk space to store the recordings.
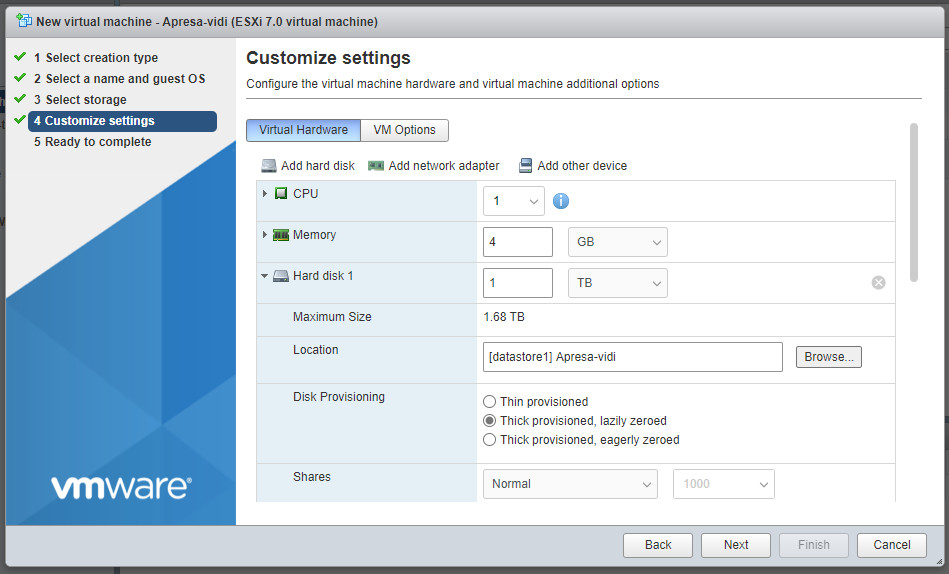
For CD/DVD Drive 1, select the option “Datastore ISO file”.
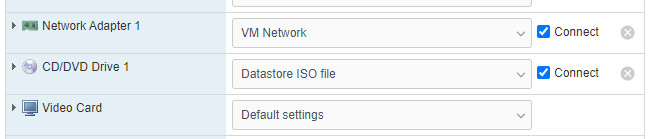
After you have selected this option, a window opens, where you can choose the iso file that has been uploaded to datastore1.
Click on the iso and click on the Select button.
Click Next, review the settings and click Finish.
If you get the message: “The VM configuration was rejected. Please see browser Console.” try again with different settings.
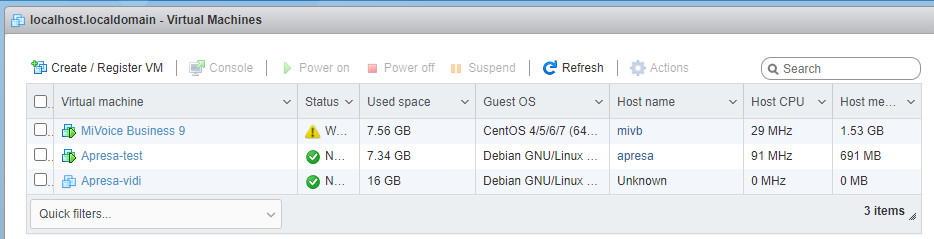
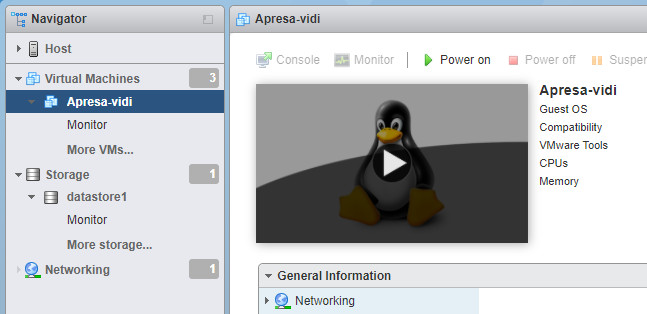
The new VM shows up in the Virtual Machines list, in this example as Apresa-vidi:
1.4 Run the Apresa installer
Go to Virtual Machines and select the virtual machine you have created. Click on Power on.
This will boot the VM and run the Apresa installer.
1.5 Install Apresa
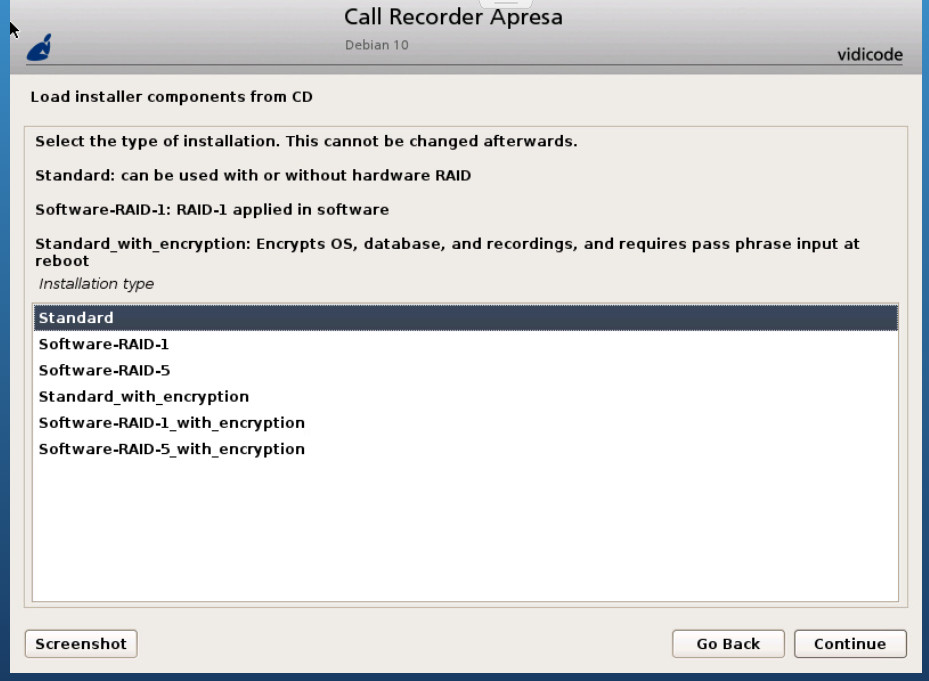
Choose Standard.
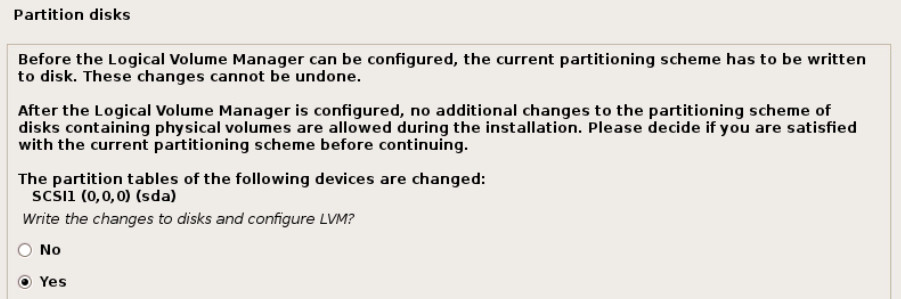
Choose Yes and click on Continue.
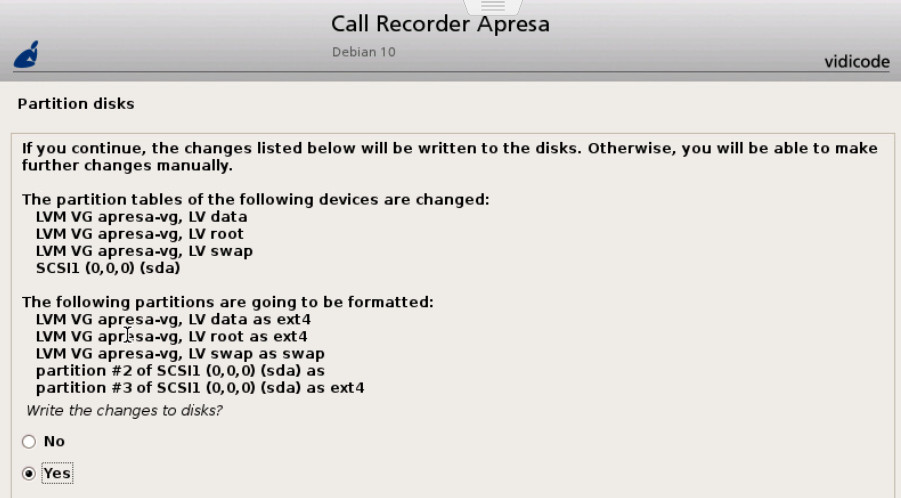
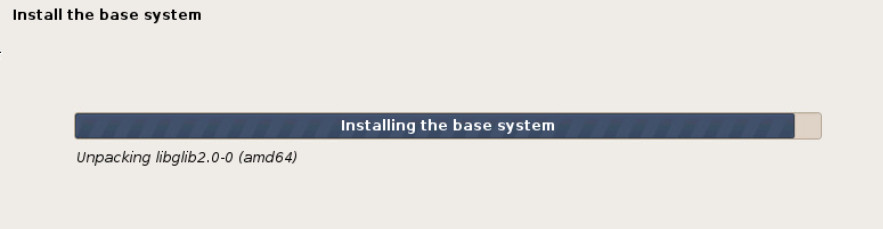
Choose Yes and click on Continue. The installation begins. The base system will be installed first.
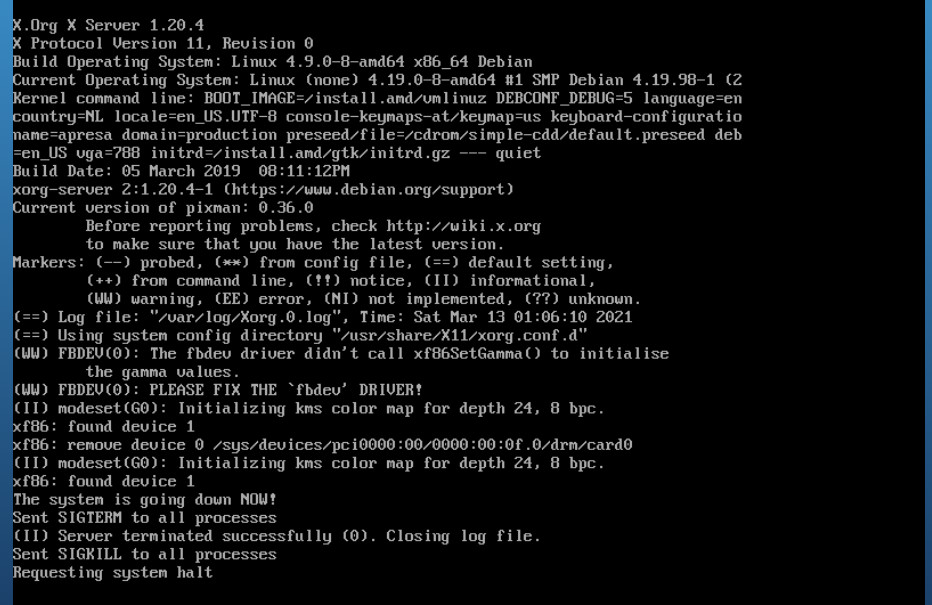
Wait until you see “Requesting system halt” on the last line of the console. Power off the VM.
Power on the VM. You will see the Apresa login.
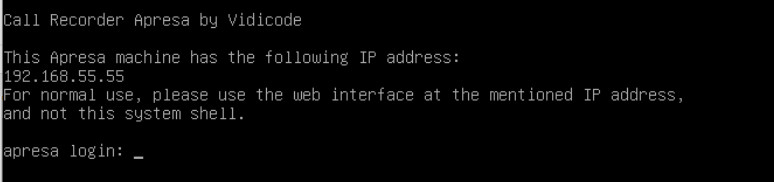
Close the console of the VM.
In a web browser, go to 192.168.55.55
Log in as:
User: admin
Password: admin
Please change this password now.
If you can’t reach the Apresa web interface using this IP address, go back to the console and use the command web. This will open Apresa the web interface in the console.
1.6 Network and internet access configuration
This chapter is about assigning a suitable IP address to Apresa.
1.6.1 Configuration with DHCP
The MAC address, if needed for DHCP configuration, can be found as follows:
• In the Tools menu, choose System
• Click System Information
The MAC address relevant to the web interface is displayed on this page.

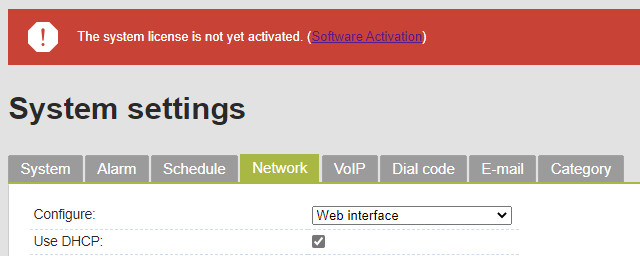
The APRESA network configuration can be changed as follows:
• In the Options menu, select System Settings
• Move to the Network tab
• Adjust the network configuration to match that of the PC network in your organization.
• Click Apply and let the network restart
After this is completed, the network configuration adjustment for the PC that was discussed can be reversed.
Visit Apresa at the new IP.
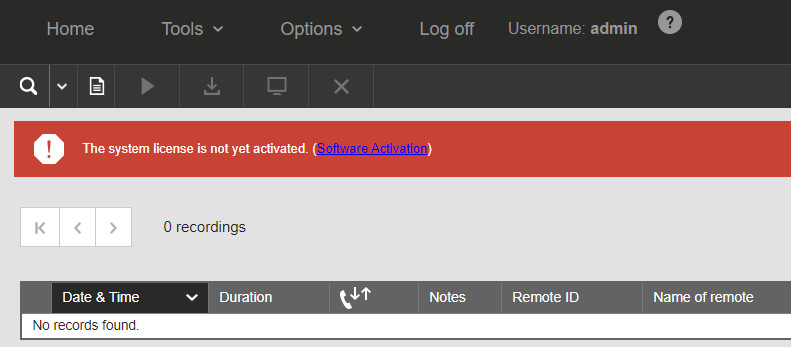
The result is a successful installation of the Apresa system. There are no licenses activated yet.
1.6.2 Configuration without DHCP
In case your are not using DHCP, follow these steps to assign an IP and configure internet access. Go to The Apresa Web interface, Options menu, System Settings, Network. Uncheck Use DHCP.
Fill in the Gateway IP address (e.g. 192.168.0.2 if that is the router’s IP) and the DNS Server IP Address (e.g. 8.8.8.8)
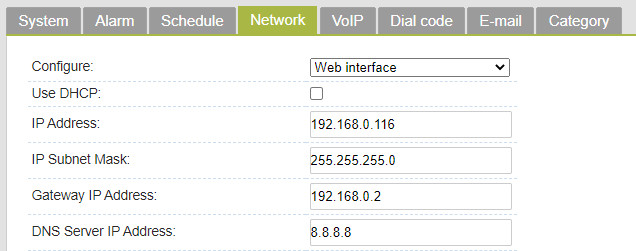
Click on the Apply button at the bottom of the page to save the configuration.
1.7 Install VMware Tools
Call Recorder Apresa needs internet access for the installation of VMware Tools.
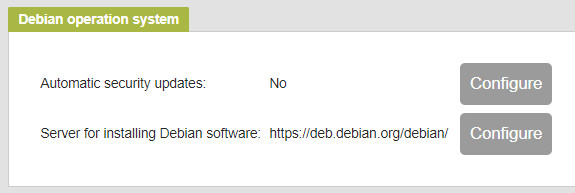
– Configure the Debian update server. In the Apresa web interface, go to the Tools menu, System, Software update. Select the Server for installing Debian software. For example:
https://deb.debian.org/debian
Log in to VMware ESXi. Select the VM you are working on. Click on the console and log in. Run the command:
sudo apt-get update
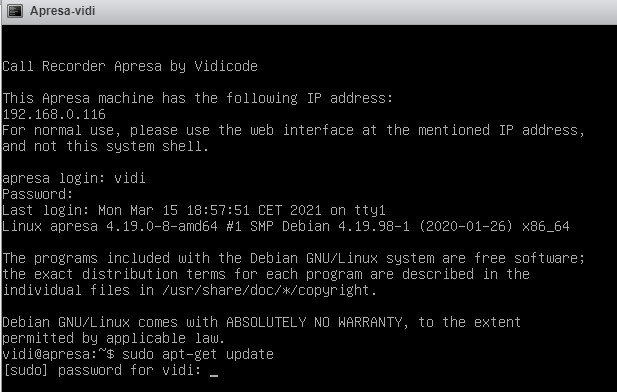
Run this command to install VMware Tools:
sudo apt-get install open-vm-tools

When the question appears “Do you want to continue?” type Y.
The installation of VMware Tools is completed.
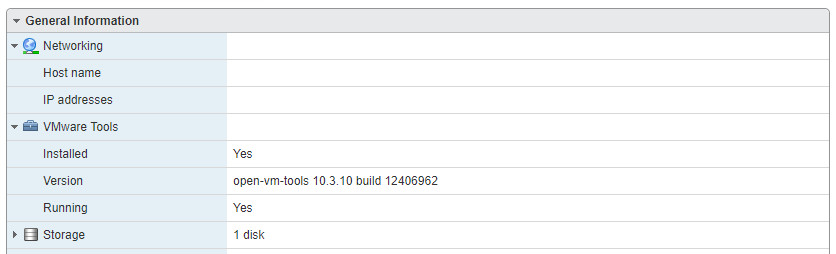
After installation of VMware Tools, the General Information of the VM will show that VMware Tools is installed and running.
1.8 Setting for Port Mirroring
The following setting is necessary when you use port-mirroring to send a copy of the telephony data to Apresa.
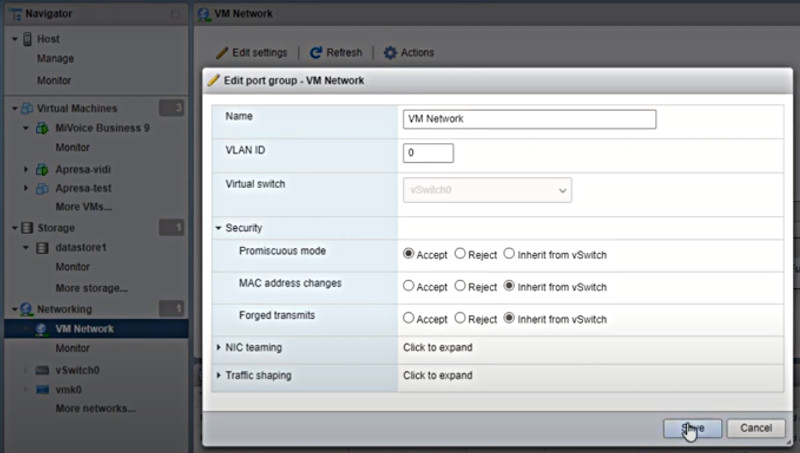
Click on Networking in the left pane of VMware. In the Networking pane, click on the “Port Groups” tab and select port group “VM Network” from the list.
Click on Edit settings. Click Security. Set Promiscuous mode to Accept. Click “Save”.